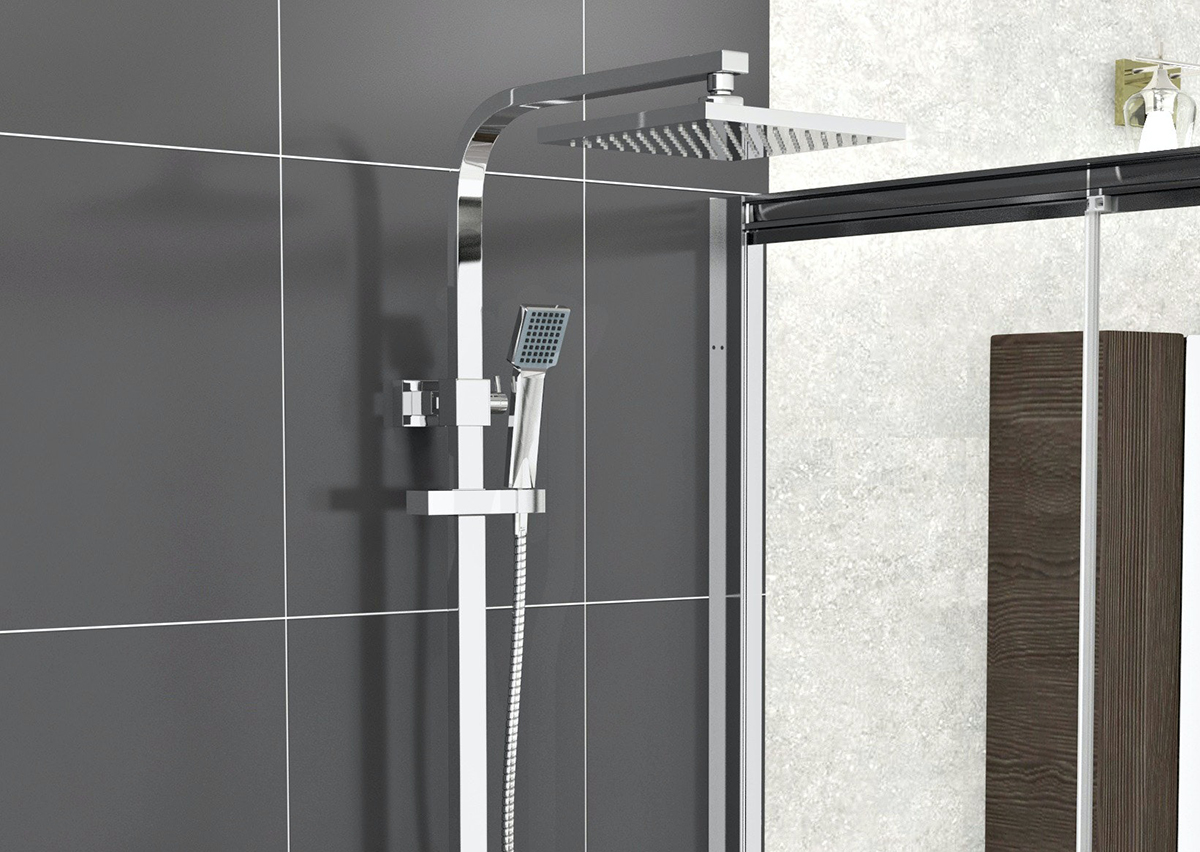
The mixer shower has become the gold standard for the modern Australian bathroom. Combining hot and cold water into a single valve, these units provide superior temperature control and a sleek, minimalist aesthetic that fits perfectly in everything from a beachside villa to a city apartment. Whether you are planning a full-scale renovation or just upgrading your current setup, understanding the mechanics of your shower is a crucial first step.
However, it is vital to distinguish between a homeowner’s desire to understand the process and the legal requirements of the Australian building industry. When learning how to plumb a mixer shower, you must realize that Australian laws are among the strictest in the world regarding water systems. This guide provides a comprehensive overview of the installation process, focusing on safety, standards, and the critical role of professional compliance to ensure your home remains safe and insured.
Also Read: How to Clean your Bathroom Properly?
Australian Plumbing Rules You Must Know Before You Start
In Australia, plumbing is a highly regulated trade. All work must comply with the AS/NZS 3500 series of standards, which dictate exactly how water and drainage systems must be installed.
- Licensed Plumber Australia: In almost every state and territory, it is illegal for an unlicensed person to perform any work that involves connecting to the main water supply or sanitary plumbing.
- DIY Restrictions: While you might be able to change a showerhead or replace a tap washer in some jurisdictions, installing a mixer valve usually requires a licensed plumber.
- Insurance & Warranties: If you perform DIY plumbing that results in water damage, your home insurance provider is highly likely to reject your claim. Furthermore, most manufacturers will void the warranty on a high-end mixer if it wasn’t installed by a professional.
- Compliance Certificates: After a professional installation, your plumber should provide a Certificate of Compliance, which is your legal proof that the work meets Australian plumbing regulations.
Tools and Materials Needed to Plumb a Mixer Shower
While the actual installation should be handled by a pro, knowing what tools and materials are required helps you prepare for the renovation and understand the quote provided by your plumber.
- Mixer Shower Unit: The internal valve and the external trim kit.
- Pipework: Usually PEX (cross-linked polyethylene) or Copper pipes ($15mm$ or $20mm$ depending on the flow requirements).
- Isolation Valves: These allow the water to the shower to be turned off independently of the whole house.
- Pipe Cutters and Spanners: For precise fitting.
- Thread Tape / Sealant: To ensure watertight connections on threaded joins.
- Spirit Level: Essential for ensuring the mixer is perfectly horizontal before the wall is tiled.
Also Read: 8 Stylish Black Taps for Bathroom you should be using
How to Plumb a Mixer Shower: Step-by-Step Overview
Here is an overview of the professional process involved in getting your mixer shower up and running.
Step 1: Turn Off the Water Supply
Safety and flood prevention are paramount. The main water meter (usually found at the front of the property) is turned off, and the lowest taps in the house are opened to drain the remaining water from the lines.
Step 2: Prepare Hot and Cold Water Lines
The hot and cold pipes are roughed-in through the wall studs. In Australia, the standard is Hot on the Left and Cold on the Right. If your home has unequal pressure (common in older homes with gravity-fed hot water), a pressure-limiting valve may be required to ensure the mixer functions correctly.
Step 3: Install the Mixer Valve
The mixer valve is the “engine” of the shower. It must be secured to a timber “noggin” (cross-brace) between the wall studs. The plumber must calculate the depth in the wall perfectly; if it is set too deep, the handle won’t reach; if it’s too shallow, the decorative faceplate won’t sit flush against the tiles.
Step 4: Connect Pipework
Using either crimped PEX fittings or soldered copper joins, the plumber connects the hot and cold inlets and the outlet pipe that leads to the showerhead. Quality seals are vital here, as these pipes will eventually be buried behind tiles and waterproof membranes.
Step 5: Test Water Flow and Temperature
Before the walls are sheeted and tiled, the system is “pressure tested” for leaks. The plumber will also check that the mixer can achieve a safe temperature range, preventing scalding—a key safety requirement in Australian building codes.
Common Mistakes When Installing a Mixer Shower
Avoiding these common errors can save you thousands of dollars in “tear-out” costs later:
- Incorrect Hot/Cold Alignment: Swapping the sides will mean your mixer works backwards, which is a safety hazard.
- Poor Sealing: Even a tiny “pinhole” leak behind a wall can lead to structural rot and mould over several months.
- Wrong Mixer Depth: Failing to account for the thickness of the villaboard, waterproofing, and tiles.
- Ignoring Water Pressure: Some high-end mixers require a specific minimum pressure to function; without it, you’ll have a disappointing, weak spray.
Also Read: Small Bathroom Renovation Ideas to Save Space
When You Should Hire a Licensed Plumber
While it may be tempting to “have a go” to save money, certain scenarios make hiring a professional non-negotiable:
- New Installations: Any time you are adding a shower where there wasn’t one before.
- Moving Pipework: If you are relocating the shower within the bathroom.
- Renovations for Resale: You cannot legally sell a house in Australia with uncertified plumbing work without disclosing it, which significantly devalues the property.
- Complex Systems: If you are installing a thermostatic mixer or a multi-head “rainfall” system.
The long-term cost savings of hiring a professional—peace of mind, insurance coverage, and a job that lasts twenty years—far outweigh the initial expense.
Conclusion
Plumbing a mixer shower is a precise task that combines technical skill with a deep understanding of Australian safety standards. While it is helpful to understand the steps involved—from roughing-in the lines to setting the valve depth—the complexity and legalities of the job mean it is a task best left to the experts. By working with a licensed plumber, you ensure that your bathroom renovation is not only stylish and functional but also fully compliant with Australian law.